Quick Guide to Black and White Photography Part 8 – Contact Sheet Printing
Printing a Contact Sheet in the Darkroom
Once your darkroom and chemicals are set up then you’re ready to begin printing your black and white photography. As mentioned in the darkroom overview description, photographic paper is sensitive to light in the same way film is sensitive to light. However, a safelight in the darkroom will allow you to see without causing harm to your paper. But whenever the enlarger is in use you need to make sure your paper is hidden so that the light from the enlarger does not accidentally expose it.
Making a Contact Sheet
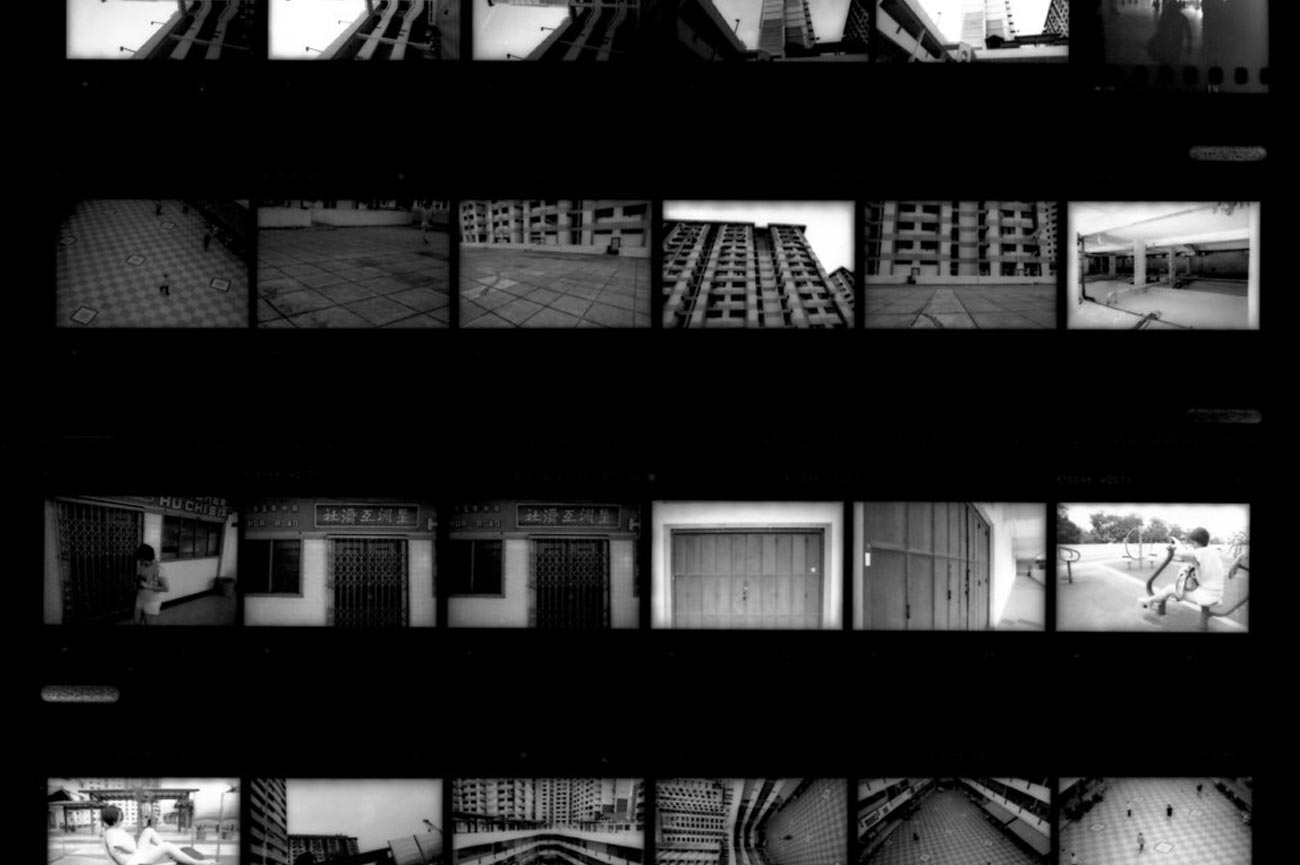
One of the first steps after you’ve developed a roll of film is to create what is known as a contact sheet. What this sheet does is provide you with a positive print of all your negatives to help you select the black and white photos you’d like to print. The contact sheet is very easy to create because it does not need to be a perfect print; it just needs to provide you with something to look at. Essentially what you will do is place down a piece of photographic paper with your negatives on top. The negatives should be emulsion side down (the emulsion side is the “dull” side). The light from your enlarger will expose the paper through the negatives and create your positive images – black parts of the negative stay white as it blocks light and clear parts of the negative print black as it lets more light through.
The easiest, most affordable solution for printing contact sheets is to buy a piece of 8”x10 “clear glass and use it to hold the negatives down on top of the photographic paper. This will ensure the emulsion of the fit holds tightly to the photographic paper. For a contact sheet your negatives can remain in the plastic sheet holder.
In order to know the appropriate length of exposure time you create a test strip. The test strip is designed to show your image at various exposure intervals to help determine the best length of time to expose the paper. In order to create a test strip you’ll need a pair of scissors (or a paper cutter) and a piece of cardboard that does not let light through (the cardboard backing on a pad of paper works). In the darkroom with the lights off and safelight on, trim an 8″x10″ piece of photographic paper into 4 eight inch strips. This small piece of photographic paper will be used to create your test strip. To begin printing your test strip follow these steps:
- Place an empty 35mm negative carrier in the enlarger and turn on the light.
- Place an 8”x10” piece of ordinary typing paper beneath light on the enlarger baseboard and move the enlarger up or down so that light completely covers the paper. The ordinary paper will simply serve as a place holder for you.
- Stop down the enlarger to around f11.
- Turn off the enlarger light and place a test strip on top of the ordinary paper, followed by the film negatives (emulsion side facing the paper) and finally your piece of glass. Make sure a row of film negatives lines up with your strip of photo paper.
- Cover all negatives over the photographic paper with your cardboard. Reveal one of the end frames so that cardboard is not covering it and the paper beneath it is visible.
- Turn on the enlarger light and expose the single frame paper for 3 seconds.
- Reveal the negative frame next to the previously exposed negative and expose for another 3 seconds. The first frame has now been exposed for 6 seconds.
- One by one continue revealing and exposing the next negative frame until all have been exposed. By the end of your strip, assuming there were 5 negative frames, you’ll now have one frame exposed for 3 seconds, one for 6, one for 9, one for 12, and one for 15.
- Develop test strip – see below for more details regarding print development.
- Find the frame where true black first shows and you have the correct exposure time.
Once you’ve figured out the exposure time you can go back to your enlarger and place an entire piece of photographic paper beneath the negatives and glass and expose for the time provided by your test strip. As you print more and more contact sheets you will find a rhythm and setting that works best for you and may not need to continue creating test strips for the contact sheet. But when you first begin printing you should always make a test strip.
Developing the Print
For this section it is assumed that you are using resin-coated (RC) paper. If using a fiber-based paper then you’ll need longer development times. Print development does not require the same exacting time as exposure of the print or development of film, however you should try to stay as close to the recommended time as possible. Having said that, you may use a wall clock to help time development of your prints rather than a timer or stopwatch.
- Slide your print face up into the developer and ensure that the entire surface is submersed. Print should be in the developer for 90 seconds.
- Agitate the developer by gently rocking the tray. You do not need to continuously agitate the developer but should do it often. Try not to come in direct contact with the print until ready to move it into the next chemical. Note: The image will start to appear fairly quickly in the developer. Do not remove the print if you simply believe it looks developed, wait at least 90 seconds.
- Carefully remove the print with your tongs from the developer and hold it above the developer for about 5 seconds to let excess developer drain off the paper. Then carefully place the print in the stop bath.
- Agitate the stop bath the same way as the developer for 30 seconds.
- Carefully remove the print and hold it above the stop bath for 5 seconds to let it drain and move it into the fixer.
- Keep your print in the fixer for about 5 minutes and agitate every now and then.
- Once fixed the print is safe to take it out into the light. You can also turn the lights in your darkroom on but just make sure any unused paper is not out in the open if you do. If you are only creating a test strip you can fix for a minute and take it out to look at it; but note by doing so your test strip will not be safe for long-term storage.
- Wash the print for at least 10 minutes under running water. Collected water should be dumped every now and then and replenished with fresh running water.
- Hang your print to dry. You can use a squeegee to help remove excess water and speed up the drying a bit.
Once your contact sheet is developed you can look to see which negatives you’d like to start printing. You do not have to wait for your contact sheet to fully dry at this stage, you can look at it after it has been in the fixer.
When you decide which negative you’d like to print first you can move on to creating your black and white photography print.
